Hello..

Saturday, January 28, 2012
Friday, January 27, 2012
How to make storm effect
See the image below? Transform this cloudy country side picture into a stormy and dramatic evening by adding simple lightning effects!

Start off by duplicating the default layer (CTRL+J) as Layer 1.
Reduce brightness of duplicate image by dragging center point of the Curves tool (CTRL+M).

Duplicate Layer 1 as Layer 1 copy. Go to Filter > Radial Blur > Zoom : 80. Set the blend mode for Layer 1 copy as 'Multiply'.

You should get something like this:

Now, create a new layer (Shift+Ctrl+N) and name it as “storm”. Go to Filter > Render > Clouds.

Next up, select Filter > Render > Difference Clouds. Apply the same filter (Ctrl+F) several times (preferably 5 times or above).

Bring out the Levels Window (Ctrl+L) and apply settings until you see lumps of clouds appearing (Input Levels: 30/0.75/175).

NOTE: Results/settings may vary as each clouds/difference clouds rendered may differ.
Once done, set storm’s blend mode to 'Color Dodge'.

Transform (CTRL+T) and scale the image. You can also adjust the perspective a little, based on the nature of your chosen image. Press Enter to apply the transformation.

Next, we should remove areas which are too bright. Follow these sub-steps:
1) Go to Windows > Channel (to bring out the channels window).
2) Hold CTRL and click on Red channel (to make a selection).
3) Go to Select > Inverse (or press Shift+CTRL+I) to invert the selection.
4) Go to Select > Feather (or press CTRL+ALT+D) and set radius : 10 pixels.

Click on the masking tool to hide the brighter parts of the layer.

Select layer mask of 'storm' layer and further adjust the levels (CTRL+L) until you have something like this (Input Levels: 0/1.70/180):

NOTE: Again, results/settings may vary as each clouds/difference clouds rendered from previous steps may differ.
I’ve decided to remove some bright areas of the storm by brushing over the layer mask with a soft black brush.

Now that we have got the storm going, lets add a few bolts of lightning.

First, create a new layer (Shift+CTRL+N) and name it as ‘lightning’. Using the Rectangular Marquee tool (M), select a square box (holding down the Shift key while dragging will create a perfect square). Bring out the Gradient tool (G) when you are done.

Create a gradient by dragging through the center of the selection.

The gradient should look like this, preferably.

With the selection still active, go to Filter > Render > Difference Clouds (or just press CTRL+F as it is your last applied filter).

NOTE: Difference Clouds rendered differs as it is randomly generated.
Press CTRL+I to invert it.

And adjust the level (CTRL+L).

Apply the lightning's blend mode to ‘Screen’.

Next, use the eraser tool to remove any hard edges. Make sure the hardness is set to 0%.

Transform (CTRL+T) the bolt of lightning to which ever way you like.

I’ve tweaked mine a little bit more; adding glows, reducing brightness, and etc. This is my final image.

Before & After

Sunday, January 22, 2012


Tuesday, January 17, 2012
Tiny sculptures in a bottle

Japanese artist Akinobu Izumi creates miniature paper sculptures and places them into miniature bottles.
Each bottle is only 22 mm ( 0.9 inch ) long and 13 mm (0.5 inch) high.


Also check out: Microscopic Sculptures and Pencil Tip Sculptures
Saturday, January 14, 2012
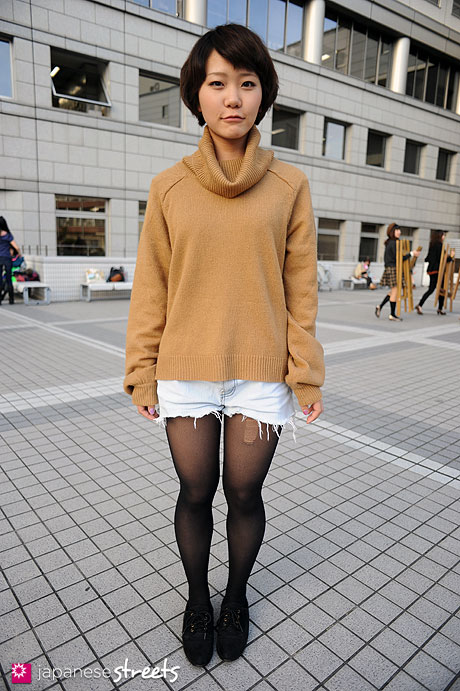
Japanese Streets Fashion
I really love something that is related with Japanese Fashion. They are inspiring to me. Even you can see alot of old people that are still fashionable on the streets. For example, a 60's year old woman wearing short skirt and black stocking. So here are the other pictures of what japanese are wearing mostly on the streets :
")


")

")

Friday, January 13, 2012

How to tie a scarf
Stumped for creative ways to tie your neck scarves? Try these tips!
♥1. Yellow Scarf: Add a corsage to spice up your scarf.
♥2. Pink and Purple Scarf: Use an infinity scarf as a shawl.
♥3. Lime Green Scarf: Fold your scarf in half, put the middle around your neck. Wrap the sides around your neck and back through the loop you made in front of your neck.
♥4. Geometric silk scarf: Add a chain to your smaller scarves with safety pins for a creative chic look.
♥5. Turquoise Tassel Scarf: Tie a loose knot and let your scarf fall like a large necklace.
♥6. Black and White Scarf: Take a chunky scarf and wrap it around your shoulders. Tie a bow.
♥7. Pink Scarf: Wrap a belt around your scarf for a vest-like feel.
♥8. Green Pashmina: Tie two corners of your scarf around your neck. Take the remaining two corners and tie them around your waist for a halter-top effect.
♥9. Coral Scarf: Tie a knot towards the bottom of your scarf.
♥10. Yellow Soft Scarf: Check out this video to see how to braid a scarf.
♥11. Black and White Leopard Scarf: Wrap a scarf around your waist to create a belt.
♥12. Yellow and Purple Scarf:What’s better than one scarf? Two!
Subscribe to:
Posts (Atom)